Physical Address
304 North Cardinal St.
Dorchester Center, MA 02124
Physical Address
304 North Cardinal St.
Dorchester Center, MA 02124


Mastering basic knife skills is essential for anyone who cooks regularly. It improves efficiency, safety, and the presentation of your food. Knowing how to hold a knife properly and make controlled cuts will make your cooking experience smoother and more enjoyable.
You don’t need professional training to start; simple techniques can make a big difference in your kitchen. This guide will cover essential tips for grip, cutting motions, and common cuts to build your confidence quickly.
With the right approach, you’ll reduce accidents and speed up prep time, making cooking less stressful. Solid knife skills are the foundation of good cooking, no matter your skill level.
Selecting the right knives lays the foundation for developing proper cutting skills. Each knife serves distinct purposes with varying blade shapes and sizes tailored to specific tasks. Understanding these will help with efficiency and safety in the kitchen.
The chef’s knife is a versatile tool, typically 8 to 10 inches long, designed for chopping, slicing, and dicing a variety of foods. Its broad, tapered blade allows for rocking motions, making it effective for cutting vegetables, herbs, and meats.
A good chef’s knife features a balanced weight between the blade and handle, offering control and reducing fatigue during extended use. Stainless steel blades are common for durability and ease of maintenance.
Proper grip and technique with this knife can improve precision and reduce the risk of injury. Beginners should focus on mastering basic cuts such as julienne, dice, and chiffonade using this knife.
A paring knife has a small blade, usually around 3 to 4 inches, which makes it ideal for detailed tasks. It excels at peeling, trimming, and intricate work like deveining shrimp or cutting small garnishes.
Its compact size offers superior control when working with fruits and vegetables that require precision. The blade should be sharp to prevent slips during delicate operations.
Paring knives are not intended for heavy chopping but are essential for prep work requiring accuracy. Maintaining a sharp edge and practicing safe handling techniques are key to effective use.
Serrated knives have a scalloped or tooth-like edge that grips and cuts through tough or slippery surfaces. This makes them essential for slicing bread, tomatoes, and other foods with hard exteriors and soft interiors.
Unlike smooth blades, serrated edges require less force, reducing crushing and preserving the texture of the food. They typically range from 7 to 10 inches in length.
Sharpening a serrated knife requires special tools or professional services, as regular sharpeners can damage the teeth. Careful cleaning and drying are advised to prevent corrosion along the serrations.
Selecting a knife involves attention to both the materials used and how the knife feels during use. Cost also plays a crucial role in finding a tool that matches your needs without overspending.
Blade material affects sharpness, durability, and maintenance. Stainless steel is common for beginners due to its resistance to rust and ease of care. It holds an edge well but requires occasional sharpening.
Carbon steel blades are sharper and easier to sharpen, but need more maintenance. They can develop a patina or rust if not dried properly. High-carbon stainless steel combines benefits, offering sharpness and corrosion resistance.
Consider blade hardness measured on the Rockwell scale (usually 55-62 for knives). Higher hardness means better edge retention, but it can be more brittle.
A comfortable handle reduces hand fatigue and improves control. Look for handles with a non-slip grip, especially if you handle wet or oily ingredients.
Materials like rubber, plastic, and wood each have pros and cons. Wooden handles are aesthetically pleasing but require more care to avoid cracking. Synthetic handles are durable and easier to clean.
Ergonomic design matters. Handles that fit well in your hand help maintain control, lowering the risk of accidents. Test different handles if possible to find one that feels secure and balanced.
Knife prices vary widely, from less than $20 to several hundred dollars. For beginners, investing between $30 and $80 typically yields a reliable chef’s knife.
Avoid very cheap knives; they often lose their edge quickly and can cause frustration or injury. Mid-range knives balance cost and quality, lasting years with proper care.
Consider long-term value. A more expensive knife might need less frequent replacement or sharpening. Also, factor in additional costs for maintenance tools like sharpeners and storage options.
Handling a knife safely involves controlling the blade, using correct cutting methods, and storing the knife properly to prevent accidents. Each aspect reduces the risk of injury and keeps the knife in good condition.
Hold the knife handle firmly with your dominant hand to maintain control. Your thumb and index finger should grip the blade just above the handle, creating a pinching action. This grip improves precision and stability.
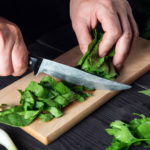
Keep your other hand’s fingers curled inward, forming a claw shape, to protect your fingertips. This “claw grip” prevents accidental cuts by guiding the food away from the blade’s path. Never extend fingers flat or point them toward the blade.
Maintain a comfortable grip without applying excessive pressure. Too much force can cause slipping or loss of control, increasing the chance of injury.
Use smooth, controlled motions when cutting to avoid sudden slips. Avoid pressing straight down; instead, use a rocking motion from tip to heel of the blade for better stability and cutting efficiency.
Always cut on a stable, non-slip surface like a wooden or plastic cutting board. Avoid cutting foods in your hand or on unstable surfaces.
Keep the blade sharp. A dull knife requires more force and can slip easily, causing injury. Regularly sharpen your knife to maintain optimal performance and safety.
Store knives in a way that protects both the blade and your hands. Options include a knife block, magnetic strip, or blade guards. Avoid tossing knives loosely into drawers.
Keep knives stored out of reach of children. Consider locks or higher storage if children are present in the home.
Clean and dry knives thoroughly before storage to prevent rust and corrosion. A clean blade is safer to handle and lasts longer.
Proper grip and controlled movements are essential to cutting safely and efficiently. Mastering hand positioning and motion allows for consistent cuts and reduces the risk of injury. Using your fingers and wrist effectively makes your work smoother.
The claw grip involves curling your fingertips inward, holding the food with your knuckles facing outward. This method protects your fingers by creating a barrier between the blade and your fingertips.
Keep your thumb behind your fingers and use your knuckles to guide the knife blade, ensuring it does not run over your skin. This grip improves stability and precision, especially when cutting small or slippery items.
The rocking motion uses a smooth, controlled rocking movement rather than an up-and-down chop. The tip of the knife generally stays in contact with the cutting board while the heel moves up and down.
This technique allows for continuous cutting without lifting the blade completely. It helps maintain even pressure and speed, making it easier to slice vegetables or herbs thinly and uniformly. Keep your wrist relaxed to avoid fatigue.
Guiding with the knuckles means resting the side of your blade lightly against your knuckles as you cut. Your fingers, curled in the claw grip, act as a physical guide, controlling the knife’s path.
This technique ensures consistent thickness in your cuts and keeps fingers safely out of the blade’s path. Adjust the distance between your knuckles and blade to vary the size of your slices. It requires practice to find the right angle and pressure, but it greatly enhances control.
Mastering basic cutting techniques improves precision, safety, and efficiency in the kitchen. Each method serves a specific purpose and requires different motions and knife control.
Slicing involves cutting food into thin, even pieces, typically using a smooth, consistent back-and-forth motion. It is important to use a sharp knife and maintain steady pressure to achieve clean cuts without crushing the food.
Common foods sliced include meats, fruits, and vegetables like cucumbers or tomatoes. Keep the tip of the knife in contact with the cutting board for better control. Slices should be of uniform thickness to ensure even cooking.
Using the right knife, often a chef’s or slicer knife, helps maintain accuracy. Avoid pressing down too hard, as this can lead to uneven cuts or damage the food’s texture.
Dicing produces small, cube-shaped pieces that cook evenly and provide an attractive presentation. Start by slicing the food into uniform slabs, then cut those slabs into strips before making crosswise cuts.
The size of the dice can vary: small (¼ inch), medium (½ inch), or large (¾ inch or more). Consistency in size is key for even cooking, especially with vegetables like onions or bell peppers.
Use the knife tip to steady the food and guide the cuts. Keep your fingers curled inward on the hand holding the food to avoid injury. A sharp chef’s knife is ideal for this technique.
Chopping is a quick, less precise cut used to break food into irregular pieces. It is perfect for ingredients where uniformity is less critical, such as garlic, herbs, or onions for stews and sauces.
The motion combines a rocking action with controlled downward force. Keep the knife tip on the board while raising and lowering the handle for efficient chopping.
Safety comes from maintaining control and a secure grip on both the knife and the food. Use a sharp knife to reduce slippage and increase speed.
Mincing creates very small, fine pieces, often used to release more flavor from ingredients like garlic, shallots, or herbs. This method requires careful, repeated chopping with a rocking motion.
A sharp knife with a wide blade helps gather and crush food against the cutting board. Work slowly to ensure a fine, even texture.
Keep the fingers curled and use the knuckles to guide the knife’s motion. Mincing enhances the distribution and intensity of flavor in dishes.
Different foods require specific techniques and knife types for safe, efficient cutting. Paying attention to texture and firmness helps determine the best approach for clean, consistent slices.
For vegetables and fruits, use a sharp chef’s knife or paring knife, depending on size. Firm vegetables like carrots and potatoes need a stable cutting board and a rocking motion for smooth cuts. Slice away from your body, applying even pressure.
Soft fruits, like tomatoes, require a serrated knife or a sharp blade with gentle sawing motions to prevent crushing. Peel tougher skins like those on squash or pineapple first, using a paring knife before cutting.
Always secure round items by cutting a flat surface first to prevent rolling. Use uniform cuts—like dice, julienne, or chiffonade—for consistent cooking and presentation.
Use a boning knife or chef’s knife for meat and poultry. Trim excess fat or sinew before slicing to ensure cleaner cuts. For poultry, cut along the joints instead of through the bones to avoid dulling your blade.
Keep the knife sharp for ease and precision. Cut against the grain of the meat for tenderness. When slicing raw meat, use long, smooth strokes; for cooked meat, shorter cuts help retain juices.
Handle bones and joints carefully to avoid slips. Keep your workspace clean to prevent cross-contamination, especially when switching between raw and cooked foods.
Bread requires a serrated knife due to its crusty exterior and soft interior. Use a gentle sawing motion to avoid crushing the crumb. For very crusty bread, apply minimal downward pressure.
Cheese knives vary by hardness—use a soft cheese knife with holes to prevent sticking. Hard cheese benefits from a sturdy blade or wire cutter, applying steady pressure to avoid crumbling.
Keep bread and cheese knives clean of residue for smooth cuts. Cut bread on a stable surface; when slicing cheese, slice in manageable portions to maintain shape and avoid waste.
Proper knife maintenance ensures sharpness, safety, and longevity. Consistent sharpening, honing, and cleaning keep knives performing well and prevent damage.
Sharpening restores the blade’s edge by removing small amounts of metal. Use a whetstone or sharpening system, starting with a coarse grit (around 400) for dull edges, then progress to finer grits (1000-6000) for a polished finish.
Maintain a consistent angle, usually 15-20 degrees, depending on the knife. Work slowly and apply even pressure. Sharpen both sides equally to keep the blade balanced. Avoid electric sharpeners unless you understand their impact on blade shape.
Test sharpness with a paper slice or by gently running the blade across your thumb (not pressing down). Regular sharpening prevents damage caused by dull blades, forcing cuts.
Honing realigns the blade’s edge without removing metal. Use a honing rod, typically ceramic or steel, before or after each use.
Hold the rod vertically, tip resting on a surface. Position the knife at the same angle used for sharpening, usually 15-20 degrees. Swipe the blade from heel to tip along the rod, alternating sides with each pass. Do this 5-10 times per side.
Honing maintains sharpness between sharpenings and increases cutting efficiency. It also prolongs the intervals needed for sharpening.
Clean knives immediately after use with warm, soapy water. Avoid soaking or dishwasher use; both can damage blades and handles. Use a soft sponge or cloth; avoid abrasive scrubbers.
Dry knives promptly with a clean towel to prevent rust and water spots. Store knives in a block, magnetic strip, or protective sheath to safeguard edges and prevent accidents.
Proper cleaning and drying help preserve both blade integrity and hygiene.
Mastering knife skills requires attention to detail and proper technique. Errors in handling, blade maintenance, and workspace setup can significantly impact safety and efficiency.
Cutting too quickly increases the chance of accidents. Precision suffers when speed is prioritized over control, leading to uneven cuts and potential injuries.
Taking your time ensures each cut is deliberate. Consistent, measured movements improve accuracy and reduce the risk of slips.
Practice patience, especially when learning new cuts. Starting slow builds muscle memory and confidence.
A dull knife requires more force, which can cause it to slip unexpectedly. This not only slows down cutting but also increases the likelihood of accidents.
Sharp blades cut smoothly, with less effort. Regularly honing and sharpening your knife maintains blade edge integrity.
Use a whetstone or sharpening tool as needed, and test sharpness by slicing through paper or soft produce.
Cutting on hard surfaces like glass or stone dulls blades quickly. These surfaces also pose a higher risk of knife slipping.
Wood or plastic cutting boards provide a safer, gentler surface. They preserve blade sharpness and offer better grip.
Avoid cutting directly on countertops or metal trays. Use a stable cutting board sized to your workspace.
Consistent practice is essential to improve your knife skills. Start with simple exercises like slicing vegetables into even pieces. Focus on controlling your knife rather than speed.
Use a stable cutting board and maintain a proper grip. Hold the handle firmly with your dominant hand, and use the other hand to steady the food, curling your fingers inward to avoid cuts.
Try these key practices for better technique:
Track your progress by observing how uniform your cuts become over time. Improving control will reduce accidents and result in better cooking outcomes.
A good practice routine includes:
| Practice Type | Duration | Focus |
| Basic slicing | 5–10 mins | Even thickness |
| Advanced cuts | 10 mins | Speed and efficiency |
| Safety drills | 5 mins | Proper hand placement |
Avoid rushing during practice. Quality and safety in your technique are more important than how fast you go. Gradually increase complexity and speed as confidence builds.